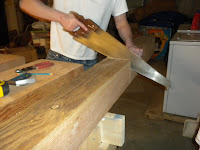
 Next, used my jackplane to roughly plane all four sides of each of the two top slab pieces. Then I worked one of the edges to get it as straight and flat as possible. I planed at an angle to the grain to remove as much material as possible. Then I followed up with my jointer plane to make the edges as straight and flat as possible.
Once I had two flat and straight edges, I stacked the two slabs up to see how they fit together. I found that there were some gaps, so I took them down and did some more planing. Once I was satisfied with the way they fit together, I took them back down and put some glue on them.
For such a long and thick slab, I needed every pipe clamp that I could get. In my case I did't have any, but fortunately I knew someone that had plenty. I ended up using 12.

 After 24 hours, I took the clamps off. My next step was to make to two long edges flat and parallel. I began working one of the edges the same way that I had worked the inside edges that I had glued together. However, this it wasn't nearly as easy because the top edge was now 12" higher. When standing on the floor, the top edge of the slab was about even with my neck. This made it almost impossible to get good downward pressure on the plane. Then I had the idea to use the leg posts and boards for the stretchers to stand on. This helped a little, but I was still not at a good angle for planing. By time I finished the first edge, I was completely exhausted and my muscles were sore for days. I realize now that I should have built two shorter saw horses before I even started, which would have made all the planing much easier.


No comments:
Post a Comment